How to choose and apply an anti-corrosion primer for painting a car on rust?
Body repair, as a rule, involves several operations before painting. These include applying an anti-corrosion primer to the body, which should perform two main tasks: ensure good adhesion of paint to metal and prevent future corrosion.
1 Types of primers for car repair – characteristics and properties
Choosing the right product for application to the body before painting will help to study the types and characteristics of primers. According to their functions and characteristics, anti-corrosion primers are divided into 2 main types. The first type are primers or primary primers. These products have high adhesion to metal and reliably protect it from rust formation. The second type is secondary fillers or primers. These materials level the repaired area and prevent the appearance of splinters. In the process of repair work, 2 layers of primer composition are applied to the car body: first, the primary primer, and then the secondary one.
The primer is applied to the metal in a thin even layer. In this case, body polishing is not performed. These primers contain orthophosphate acid, which forms a thin and uniform protective film. The latter, in turn, is quickly attracted to the metal and protects it from corrosion.
According to their composition, primary soils are divided into 2 types: one- and two-component. The difference between them lies in the fact that the first type of product does not need to add a catalyst, while the two-component composition must be mixed with catalysts.
The main task of putties is to eliminate small irregularities and micropores that remain after applying primers. In most cases, two-component, high-filling acrylic primers are used. The last property of fillers depends on the content of dry residues in their composition. According to this factor, the secondary primers are called MS and HS tags. HS type primers require 30% less than MS labeled primers. The secondary primer must be sanded after application.
2 Preparing to work with the body – what to do?
In no case do not forget that the anti-corrosion primer is a product consisting of chemical compounds, so be sure to wear goggles, gloves, special clothing and shoes before applying it. To protect your lungs, be sure to wear a respirator and work with the primer only in a well-ventilated area.
In order not to stain other parts of the body with soil, we recommend masking them with thick paper or plastic wrap. Be sure to hide the wheels, headlights, glass and door handles under the bottom, as it will be very difficult to clean the surfaces after they are dirty.
Immediately before application, shake the material well until a thick, homogeneous liquid without sediment is obtained. Pour some of the primer into a small clean container and add the hardener and thinner. One-component primer requires the addition of approximately 20% thinner. In turn, the two-component material must be mixed first with the hardener and then with the thinner. The optimal proportions are usually indicated on the packaging of the soil.
3 Priming – the correct procedure
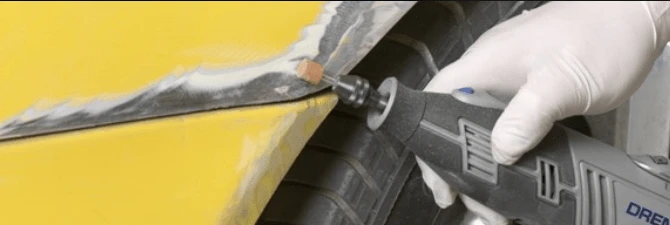
Anti-corrosion primer must be applied to a clean surface, so a few minutes before application, remove dust with compressed air or a damp cloth. After that, be sure to degrease the surface. Therefore, all those places where the product will stick to the metal must be perfectly clean.
The primer should be applied with a spray gun, so you can spray the product as evenly as possible. Before that, check the operation of the tool on an unnecessary old object, and at the same time adjust the spray gun torch. The additional procedure for applying the primer is as follows:
- The primary rust primer is applied to the car as thinly as possible. After that, the product will need to be dried at a temperature of 20-30 ° C. It takes about 1.5 hours to completely dry.
- Be sure to apply a secondary primer in 2-3 coats. In this case, the first of them should not be thin, but not too thick. The second and third layers should be thin. Give each of them 10 minutes to dry. Apply the next layer after the previous one becomes matte. Do not apply the primer more than three times, otherwise the product may shrink.
- After applying the last layer, the coating must be allowed to dry. To do this, you can either wait about a day, or speed up the process using UV lamps for drying. The distance between them and the body should not be less than 80 cm.
- After the putty has completely dried, inspect the surface for defects. If they are, and they cannot be removed by grinding, finishing putty with subsequent grinding will help to remove chips and cracks. Before applying paint, do not forget to treat the place of putty with a primer.
Next, just before the painting process, sand the body again. This can be done on both wet and dry surfaces. In the second case, use a special grinder with a soft plate and an eccentric to process the case. For sanding dry surfaces, it is recommended to use P320 and P400 sandpaper, finishing with P500 sandpaper. Wet sanding should be done with P500-P600 grit.