Tuning Volvo 740 – successful solutions for the modernization of the Swedish “old man”
Tuning Volvo 740, as a rule, involves the elimination of some factory defects. Most of the standard elements of the car are made of high quality materials, which ensures a long service life and reliability. It is impossible to find fault with the assembly of the car – this, as they say, is a matter of conscience. What is wrong with the car and what needs to be done to improve it?
Content
- 1 Zero point setting to increase engine power
- 2 Suspension upgrades – how to simplify the operation of the machine
- 3 Cabin tuning with carbon film
1 Mounting a zero to increase engine power
According to experts, the first element to be replaced under the hood of the Volvo 740 is the factory filter. A zero resistance filter is used for tuning. Due to its design, it allows much more air to pass through without losing its filtering capacity. As a result, the Volvo engine increases its power by about 5-10%, which accelerates the acceleration of the car and increases the top speed to 200 km / h. Okay, not bad for a model that is already middle-aged.
Installing and using a zero resistance filter provides the Volvo 740 driver with a number of advantages. Firstly, the element filters the air much better than the standard one. This has a positive effect on the quality of the air-fuel mixture. As a result, the elements of the car's fuel system are sometimes clogged less often than a regular filter.
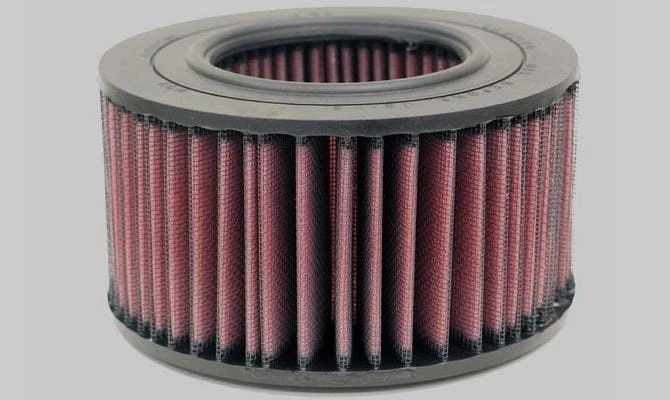
Zero resistance filter for Volvo 740 Secondly, the driver solves the problem of having to change the filter regularly. The zero wheel does not need to be changed every 7-10 thousand km. It is enough to replace every 25 thousand km. Thirdly, the part does not require special care. All that is needed is to flush it with the same liquid that is used to flush the nozzles. And fourthly, the zero point has a positive effect on the operation of the throttle position sensor and the shock absorber itself, which does not clog as much as when working with a standard filter. To replace the Volvo 740 factory filter, you need to prepare the following tools:
- Phillips screwdriver
- bunch of keys;
- pliers;
- knife;
- cleaning agent.
First you need to disassemble the regular element. It is located on the left side of the engine compartment and is easily identified by the characteristic struts at the top of the part. We remove the part by first unscrewing the fasteners. Next, take the pliers and carefully lift the wide steel clamp holding the element. We disassemble the filter, trying not to damage the filter element. Next, we take a knife and, without pressing hard on it, remove the dirt on the upper surface of the pipe. Next, carefully process the workpiece with a cleaner and set the zero point. It is better to install a new filter on the mass air flow sensor. It is located slightly to the right of the nozzle. Thus, the new part will be able to rotate, completely absorbing the air entering it from the outside.
2 Suspension upgrades – how to simplify the operation of the machine
The quality of our roads, of course, leaves much to be desired. Hardened domestic cars also suffer from this, not to mention imported cars with lower ground clearance. Owners of the Volvo 740, like drivers of other foreign cars, have only one thing left to do – raise the body of the car in order to simplify its operation and extend the life of parts located closer to the bottom.

High Suspension for Volvo Body
To increase the ground clearance of the Volvo 740, it is better to use special spacers, a set of which can be purchased both in the store and on various sites on the Internet. You can find elements from different materials. They vary in duration and cost. Most often on sale you can find polyurethane parts. They are distinguished by reliability and long service life. However, they have one significant drawback – it is the polyurethane part that wears out during operation, and the steel elements of the spacers bend and begin to scratch the Volvo body. Aluminum elements are more reliable, but they are prone to corrosion. Oddly enough, plastic spacers have the greatest strength and protection against damage, the shortcomings of which have not yet been identified.
After buying spare parts, you need to decide where to tune the car. If you decide to do everything yourself, then you need to hang the car on an elevator or put it on a viewing hole. Next, remove the wheel and anti-roll bar. Then you need to unscrew 2 more nuts holding the front strut. To completely disassemble it, you need to unscrew 3 more nuts holding it on top. You can then remove the A-pillar from the Volvo 740 and work directly on it. You will notice that the standard fasteners holding the part are too short to put on the gasket and re-attach. You need to remove all old bolts and use new ones. Next, we put a spacer, fix it with new fasteners and assemble the finished rack on the car. Do the same for each Volvo wheel.
3 Interior tuning with carbon film
After tuning the engine and suspension of the Volvo 740, it's time to think about improving the interior. In order for the outdated model to acquire a more modern look, experts recommend pasting over the interior elements with carbon fiber. When choosing a material, you need to decide on its texture. If you're faced with a choice between textured film and embossed CFRP, don't hesitate to choose the latter. Looks more impressive and solid.
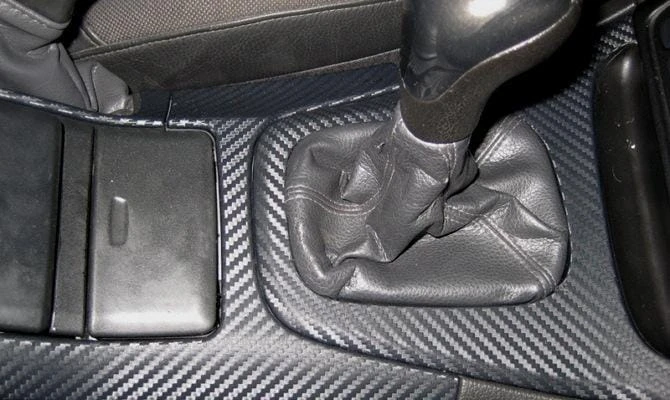
Advances in carbon fiber Many drivers believe that when it comes to carbon cockpit lining, it can be done with all the elements of the cockpit. In fact, this is not entirely true, because parts with sharp edges are not so easy to stick. Not all professionals take on this job. Therefore, it is better to design elements that have a relatively large area and a smooth surface. For work, in addition to the film, we need:
- scissors;
- pen;
- stationery knife;
- glue;
- building or powerful hair dryer for home use.
The parts that we will be gluing must be removed from the Volvo interior. Next, we put them on the film and mark the places where it is necessary to cut the coal. We cut out the product taking into account the back, which we will wrap the inside of. It is better to make a large butt first, and then decide on the exact length and width. Next, remove the coal from the base and glue it to the disassembled element. In this case, the film must be constantly smoothed so that wrinkles do not form on it. Next, fold the product under the edges of the part, carefully examining the folds. In these parts, the product should be cut in the direction of the radius of the glued element, not reaching the edge of 4-5 mm.
Then we heat the film and wait until the pattern on its surface begins to change its aspect ratio. The product itself will become more elastic and can be stretched. This is the optimal time for the final adhesion of the carbon film to the product. After the product has settled on the element, it is necessary to cut off the excess parts of the film. To make it more stable, you should take superglue and apply 1-2 drops to the joints of the parts you have already glued.